Installation and Use
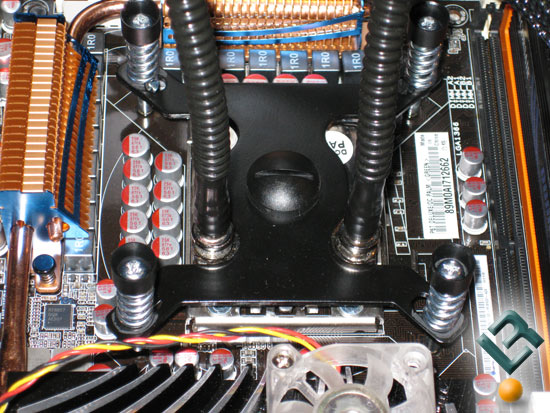
Installing the Domino A.L.C. was a fairly easy and for most will require just a Philips head screwdriver to tighten down the water block to the backplate that was installed on the back of the motherboard.If you are adding the cooler to a system that is already built you will have to remove the motherboard unless your old cooler just by chance uses a backplate with the right size threads on it and in that case you can re-use the old bracket. The black little cups on the screws used for the retainer are for tool run-off protection. If you've built PCs over the years I'm sure you've had the accidental screwdriver slip and this will prevent from happening.
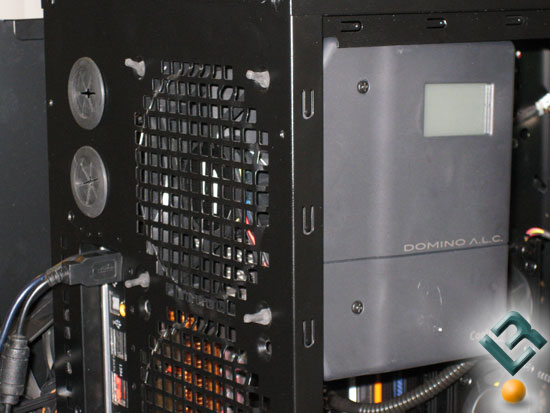
The retainer that comes pre-installed on the unit is already set up for the Intel LGA1366 sockets, so no adjustment was needed here. If you are using an Intel LGA775 socket you'll have to move the mounting screws in one notch, which means you need to remove a clip and change to the other mounting hole as the socket is smaller. AMD users will have to switch the top mounting bracket altogether. After the waterblock is tightened down to the motherboard you just need to install the unit to the chassis by pulling the rubber mounting hardware through the 120mm fan holes located at the rear of your case. If you don't happen to have a spot for a 120mm fan you might be able to remove the 120mm fan and use the holes in the fan to mark and drill some holes in the case to mount it yourself.
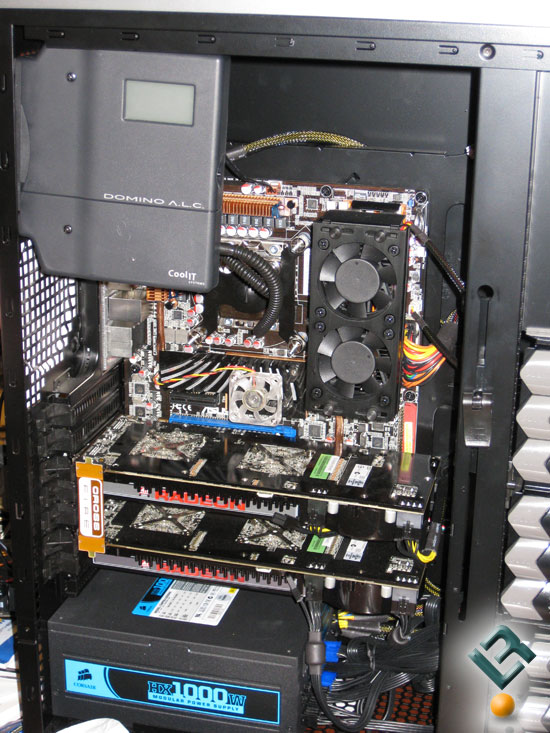
Once I got it all installed and running in the my Thermaltake Spedo Advance chassis I noticed that the Domino A.L.C. was hanging a bit crooked. I noticed that the top two rubber mounts were hanging down a bit since they were supporting most of the weight and that is the reason it was not sitting straight. The only way to fix this is to change out the rubber mounts and install the regular old fashioned screws. If you plan on taking your case to a LAN party or move it around often I highly suggest using the screws. It should also be noted that the plastic tubes are not that flexible, making it a bit of a challenge to mount the CPU block. So be sure to tighten everything up all the way to ensure that the waterblock is sitting flush on the processor. After installing this cooler a few times I found it best to start with the mounting screws that are along the rear of the chassis as they have the most tension on them. Some of you might have noticed that both of the rear 120mm fans have been removed in the Thermaltake Spedo Advance pictured above. The lower 120mm fan was making contact with the Domino A.L.C. housing and the unit could not be installed with the lower fan in the case. In this particular chassis that means that both rear 120mm fans had to be removed, which is a bummer, but what can you do.
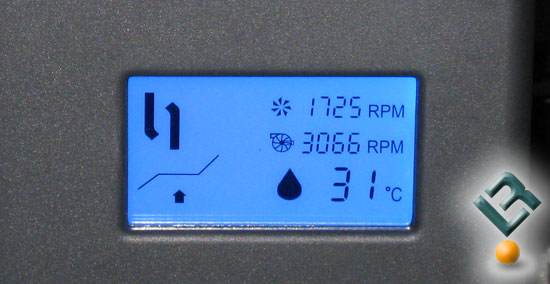
With the Domino A.L.C. installed into the chassis plug in the 3-pin fan power header that powers the cooler and you're ready to fire the system up for the very first time. I highly suggest leaving the case door off during the initial run as you should check for leaks and will need to use the LCD to set the fan speed to the desired level. When I fired up the CoolIT Domino A.L.C. for the very first on the Intel Core i7 920 processor it worked great and was leak free. The display shows you what mode you are running along with other information like system alerts, speeds and temperatures.
| Mode | Fan Speed | Pump Speed |
| Low | 1130RPM | 3040RPM |
| Medium | 1725RPM | 3066RPM |
| High | 2790RPM | 3030RPM |
In order to see what the mode settings did I tried out each setting and found that the fan speed is the only thing that seemed to change in each of the three different operational modes.
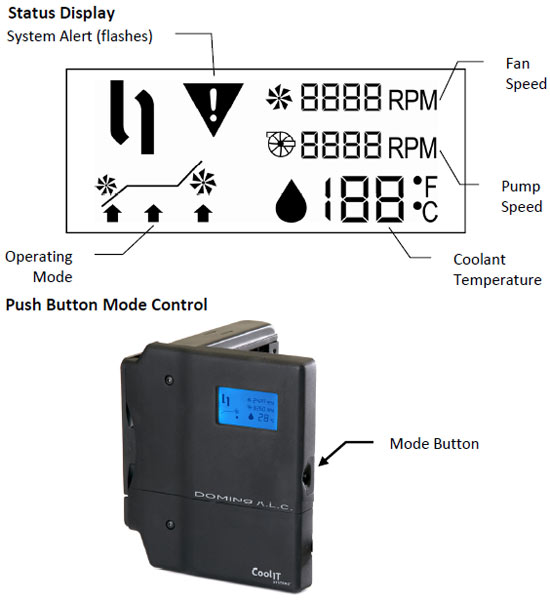
The Domino A.L.C. has a mode button located on the side of the cooler that changes the operating mode between low, medium, and high. to change modes simply press the mode button on the side till you arrive and the desired setting and you will be good to go. If something ever goes wrong with the Domino A.L.C. you will be able to see an alert on the LCD or hear an auditory alert if operation outside of acceptable ranges is detected. In all alert conditions, the System Alert icon will flash repeatedly and an auditory alert will sound for 10 seconds then continue as a short beep once per minute until normal operating conditions are restored. The cooler is very simple to operate as you can see as you have just a button that changes between three operating modes. If you want the best performance you need to run it at high, specially if you plan on overclocking.